Most climbers these days are familiar with the idea of campus board training. However, there is a misconception that campus board training is an exercise that only the most experienced climbers should pursue. Wrong! If you're bouldering in the V3-V4 grade range, the strength enhancing results that come as a result of campus board training will be greatly beneficial to your climbing performance.
To begin, a conditioning phase of two sessions per week for four weeks will be sufficient. Make each session about 30 minutes long so you can easily fit it into your indoor climbing session. Ideally you'll have a training partner to help time rests and support you (quite literally when you do Tabatas!) and also to spot you on some of the more dynamic exercises. Campussing takes time to get used to and working as a pair makes it a great deal easier to train effectively and efficiently.
Be aware that campussing can be quite tough on the skin and joints so pre-taping may be advisable to prevent flappers.
Campussing 101
Do not crimp
Never crimp whilst campussing. The short term gains are more than offset by long-term injury problems! Only the very strong and experienced will crimpm and only for specific reasons. As a general rule the full hang or the "chisel" half-crimp position are the only safe ways of using the campus rungs, although it is likely that, over time, you will find your own specific way to hold on.
Warm up well
Warming up well before starting the sessions is key to maximising the result and avoiding injury. A minimum of 20 minutes of bouldering including a few relatively tough problems should be sufficient, but it's important that you listen to your body and increase this time as per your personal needs.
Wear your climbing shoes
Wearing climbing shoes is highly recommended, at least initially, you want all the help you can get!
The Campus Board
No single campus boards is the same as the next. Unless you're lucky enough to have a campus board at home, you will often have to make do with whatever setup is available at your local indoor gym. Don’t worry if this is the case. With the right approach and technique, you should still be able to make good gains with whatever setup you have at your disposal.
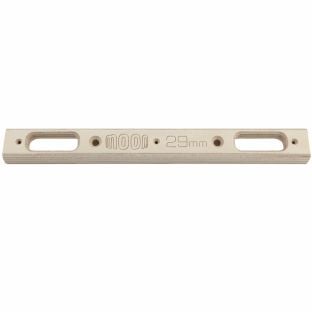
What rung size?
A minimum of two different rung sizes is advised. One 28-30mm, and the other 23-25mm.
Rung spacing
11cm between each rung.
Campus board angle
13-17 degrees
Kickboard depth
Set the gap between the bottom of the campus board and the top of the kickboard to between 500-600mm.
Foot rungs
10-15mm deep with 150mm gap between each rung.
Campus Board Exercises
Virtually all the exercises below are feet-on unless otherwise specified. Don't forget your climbing shoes.
Double Dynos
Jump from one rung to another with both hands moving together, landing on the higher run at the same time. It's not a double dyno if one hand arrives later than the other.
One Arm Dynos
Start with both hands on the same rung. Jump one hand to a higher rung, ensuring that you are hanging exclusively on the other hand before you attempt to move up.
Taps
Both hands start together on a rung then one hand reaches up to a nominated higher rung, lightly taps it then returns to the matched position. The other hand then replicates the movement and the process continues until the set is completed.
Ladders
A classic campus board exercise. Start with both hands on the same rung. Move up the rungs one hand at a time, missing out the rung held by the other hand. Your hands will only be matching on the first rung and the last rung. Reverse this process back to the starting position and continue until you complete the set.
Offset Ladders
A slightly harder version of Ladders. Starting on the lowest rung, move one hand to a higher rung (e.g. rung 3). Whilst holding the rung with one hand move the other hand to the rung above (e.g. rung 4) before bringing up the other hand to match.
Tabata Deadhangs
With both hands together on a rung, hang straight armed with your feet on the lowest kickboard rung.
Lock Offs
Start with both hands together and your feet on one of the kickboard rungs. Pull up into a full lock. Hold this for 10 seconds, then lower into a 90-degree lock. Hold for another 10 seconds, then step off.
Tucks
No feet. The same as the Deadhang, but tuck your knees up as high as possible. If you cannot do this exercise footless, place one foot on the highest kickboard rung you can reach. This is a tough exercise!
Reps & Sets
A description of what constitutes a single repetition will be made for each exercise as they appear below.
Session One
Rung Size: 28-30mm
Feet: Always on the kickboard
Rest: 4-minutes between each exercise.
LH/RH = Left hand / Right hand
# = Rung number
- One Arm Pull Ups - Two sets of three reps for each arm. Rest 1 minute between each set.
- Double Dynos - Start LH#1, RH#1, then LH#2, RH#2, etc. Make six attempts and be brave!
- Taps - Start (LH#1 RH#1, RH#3/4, RH#1, LH#3/4, LH#1) = 1 rep. Repeat without stepping off 5-8 times (1 set).
- Ladders - Start: (LH#1 RH#1, RH#2, LH#3, RH#4, LH#4, RH#3, LH#2, RH#1, LH#1) = 1 rep. Do 2 sets of 2 reps with 3 minutes rest in between sets.
Session Two
Feet: Feet-on except for sets 7 and 8.
- Pull Ups - 20 seconds on, 10 seconds rest.
- Pull Ups - 20 seconds on, 10 seconds rest.
- Deadhangs - 20 seconds on, 10 seconds rest.
- Deadhangs - 20 seconds on, 10 seconds rest.
- Locks - 20 seconds on, 10 seconds rest.
- Locks - 20 seconds on, 10 seconds rest.
- Tucks - 20 seconds on, 10 seconds rest.
- Tucks - 20 seconds on, 10 seconds rest.